
Written Instructions
Let's walk you through how to edit the seat map.
Adding and Adjusting Seats
- From the Home tab, click on Settings
- From the left-hand navigation of Settings, locate the office you want to update and click on the name.
- Scroll to the ‘Seatmap & Capacity’ section. Here you can review your floor plan and make updates to the desks and desk amenities. By default, you are in the ‘Edit’ mode of the floor plan.
- In order to add a seat, click the "+Seat" button and then just drag and drop wherever you want the seat to be placed. In addition to adding the seat, you can:
- Adjust the position of the seat by selecting the seat and then holding your left mouse button as you drag the seat to its preferred location.
- If you no longer need a seat, you can remove it from the floor plan by selecting the seat and then clicking the "Delete" button on the right panel.
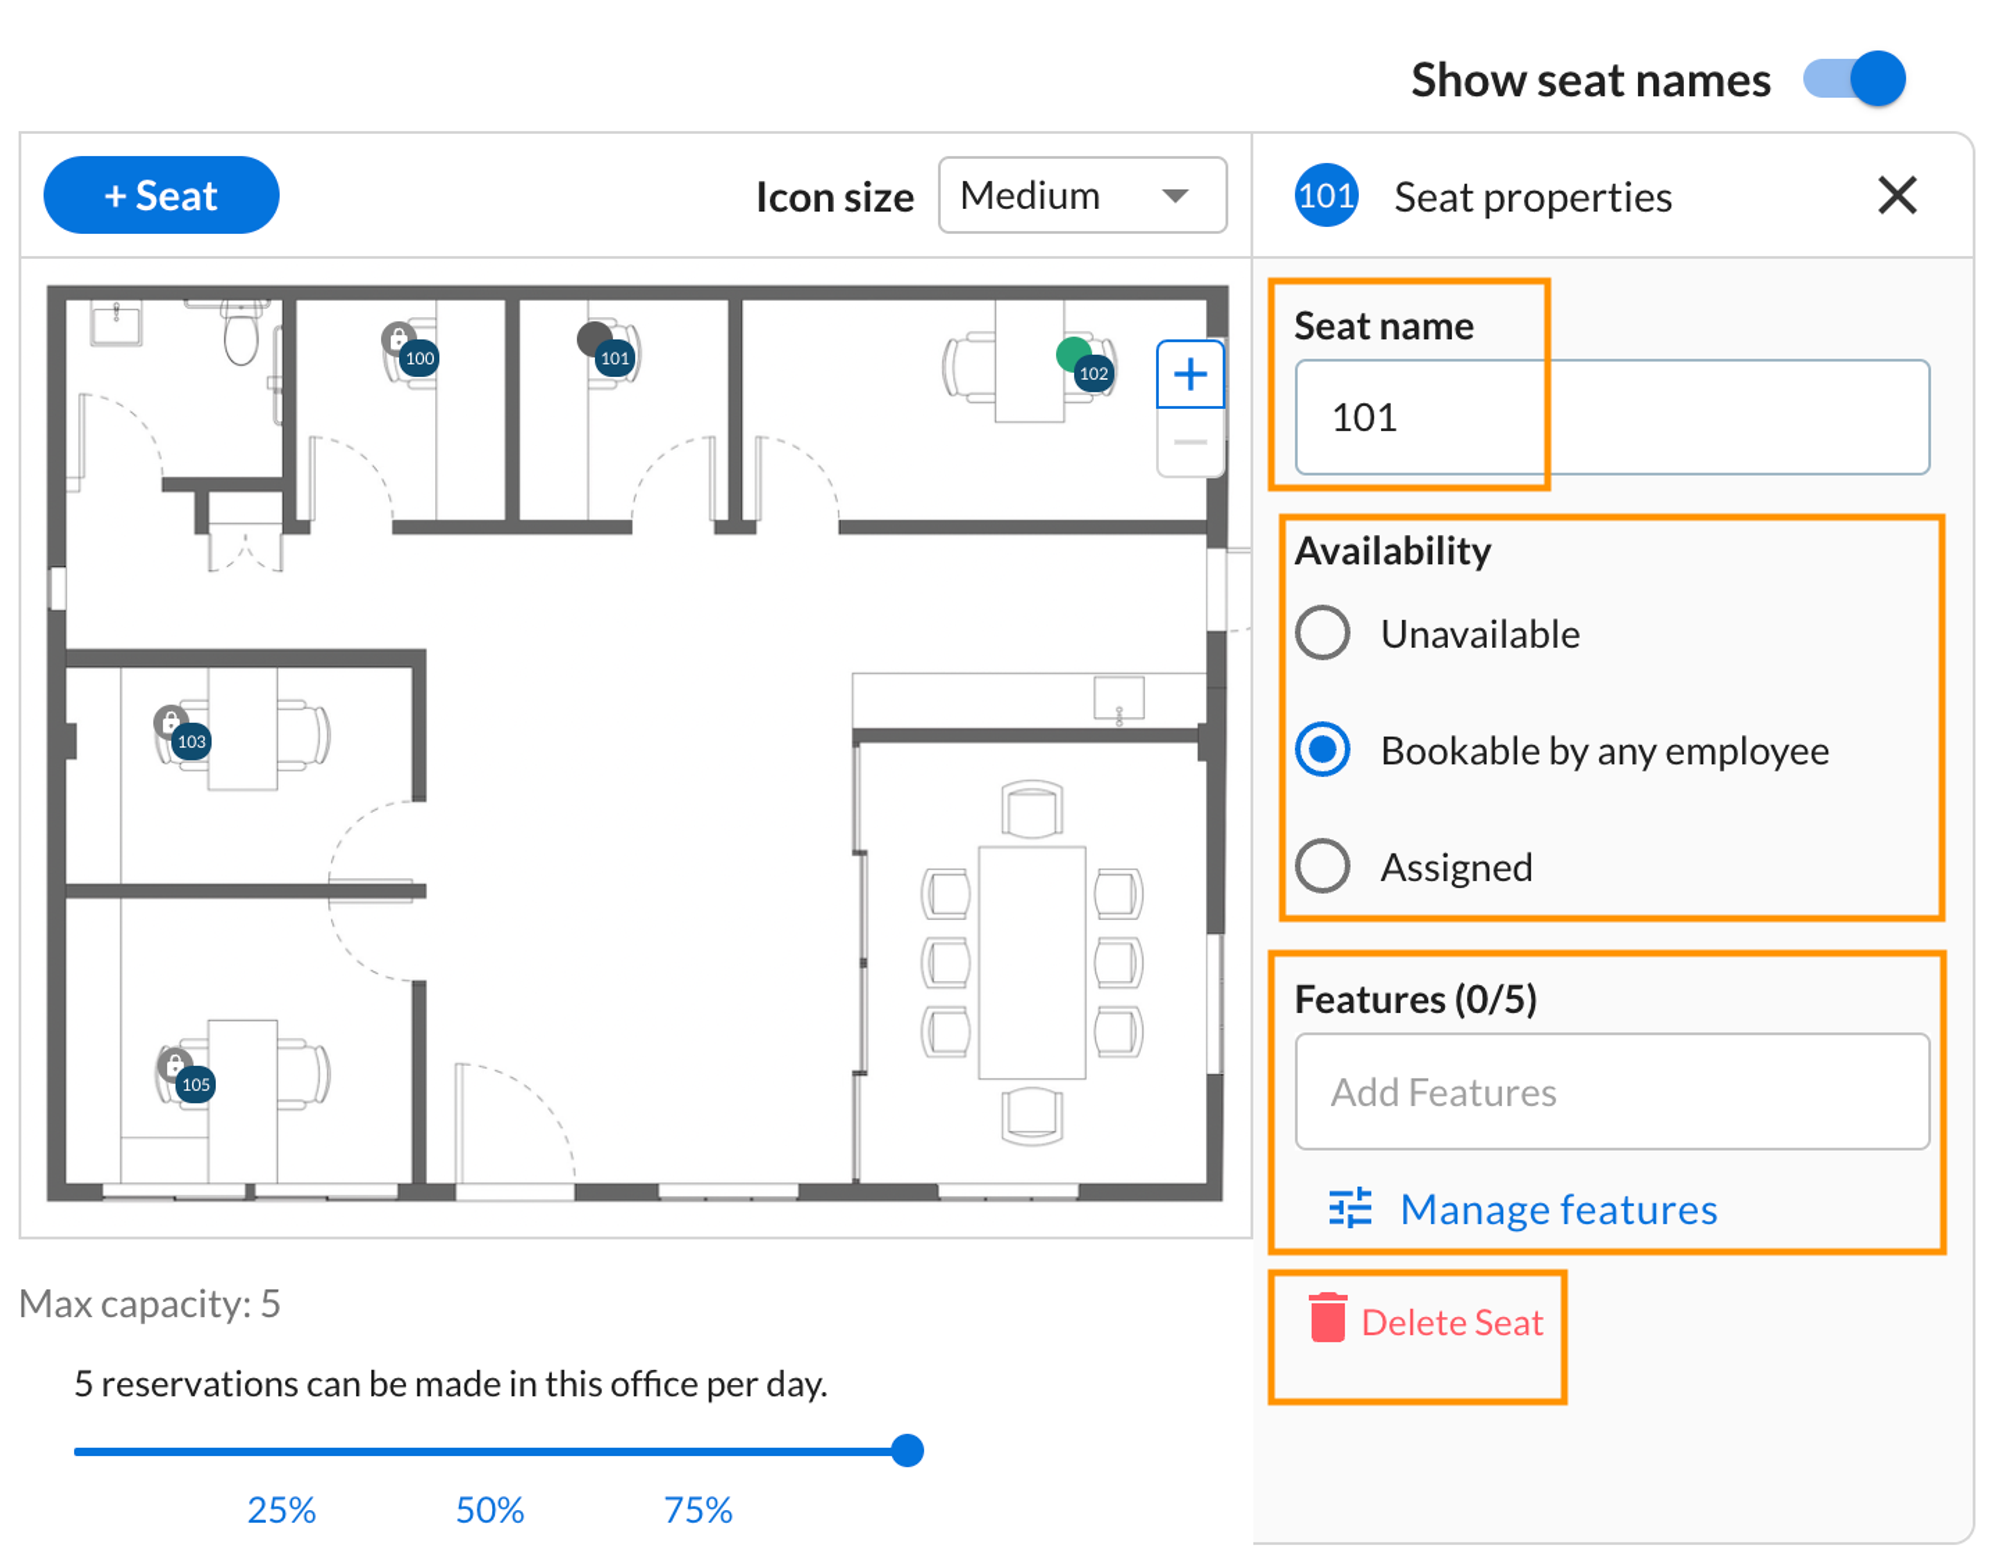
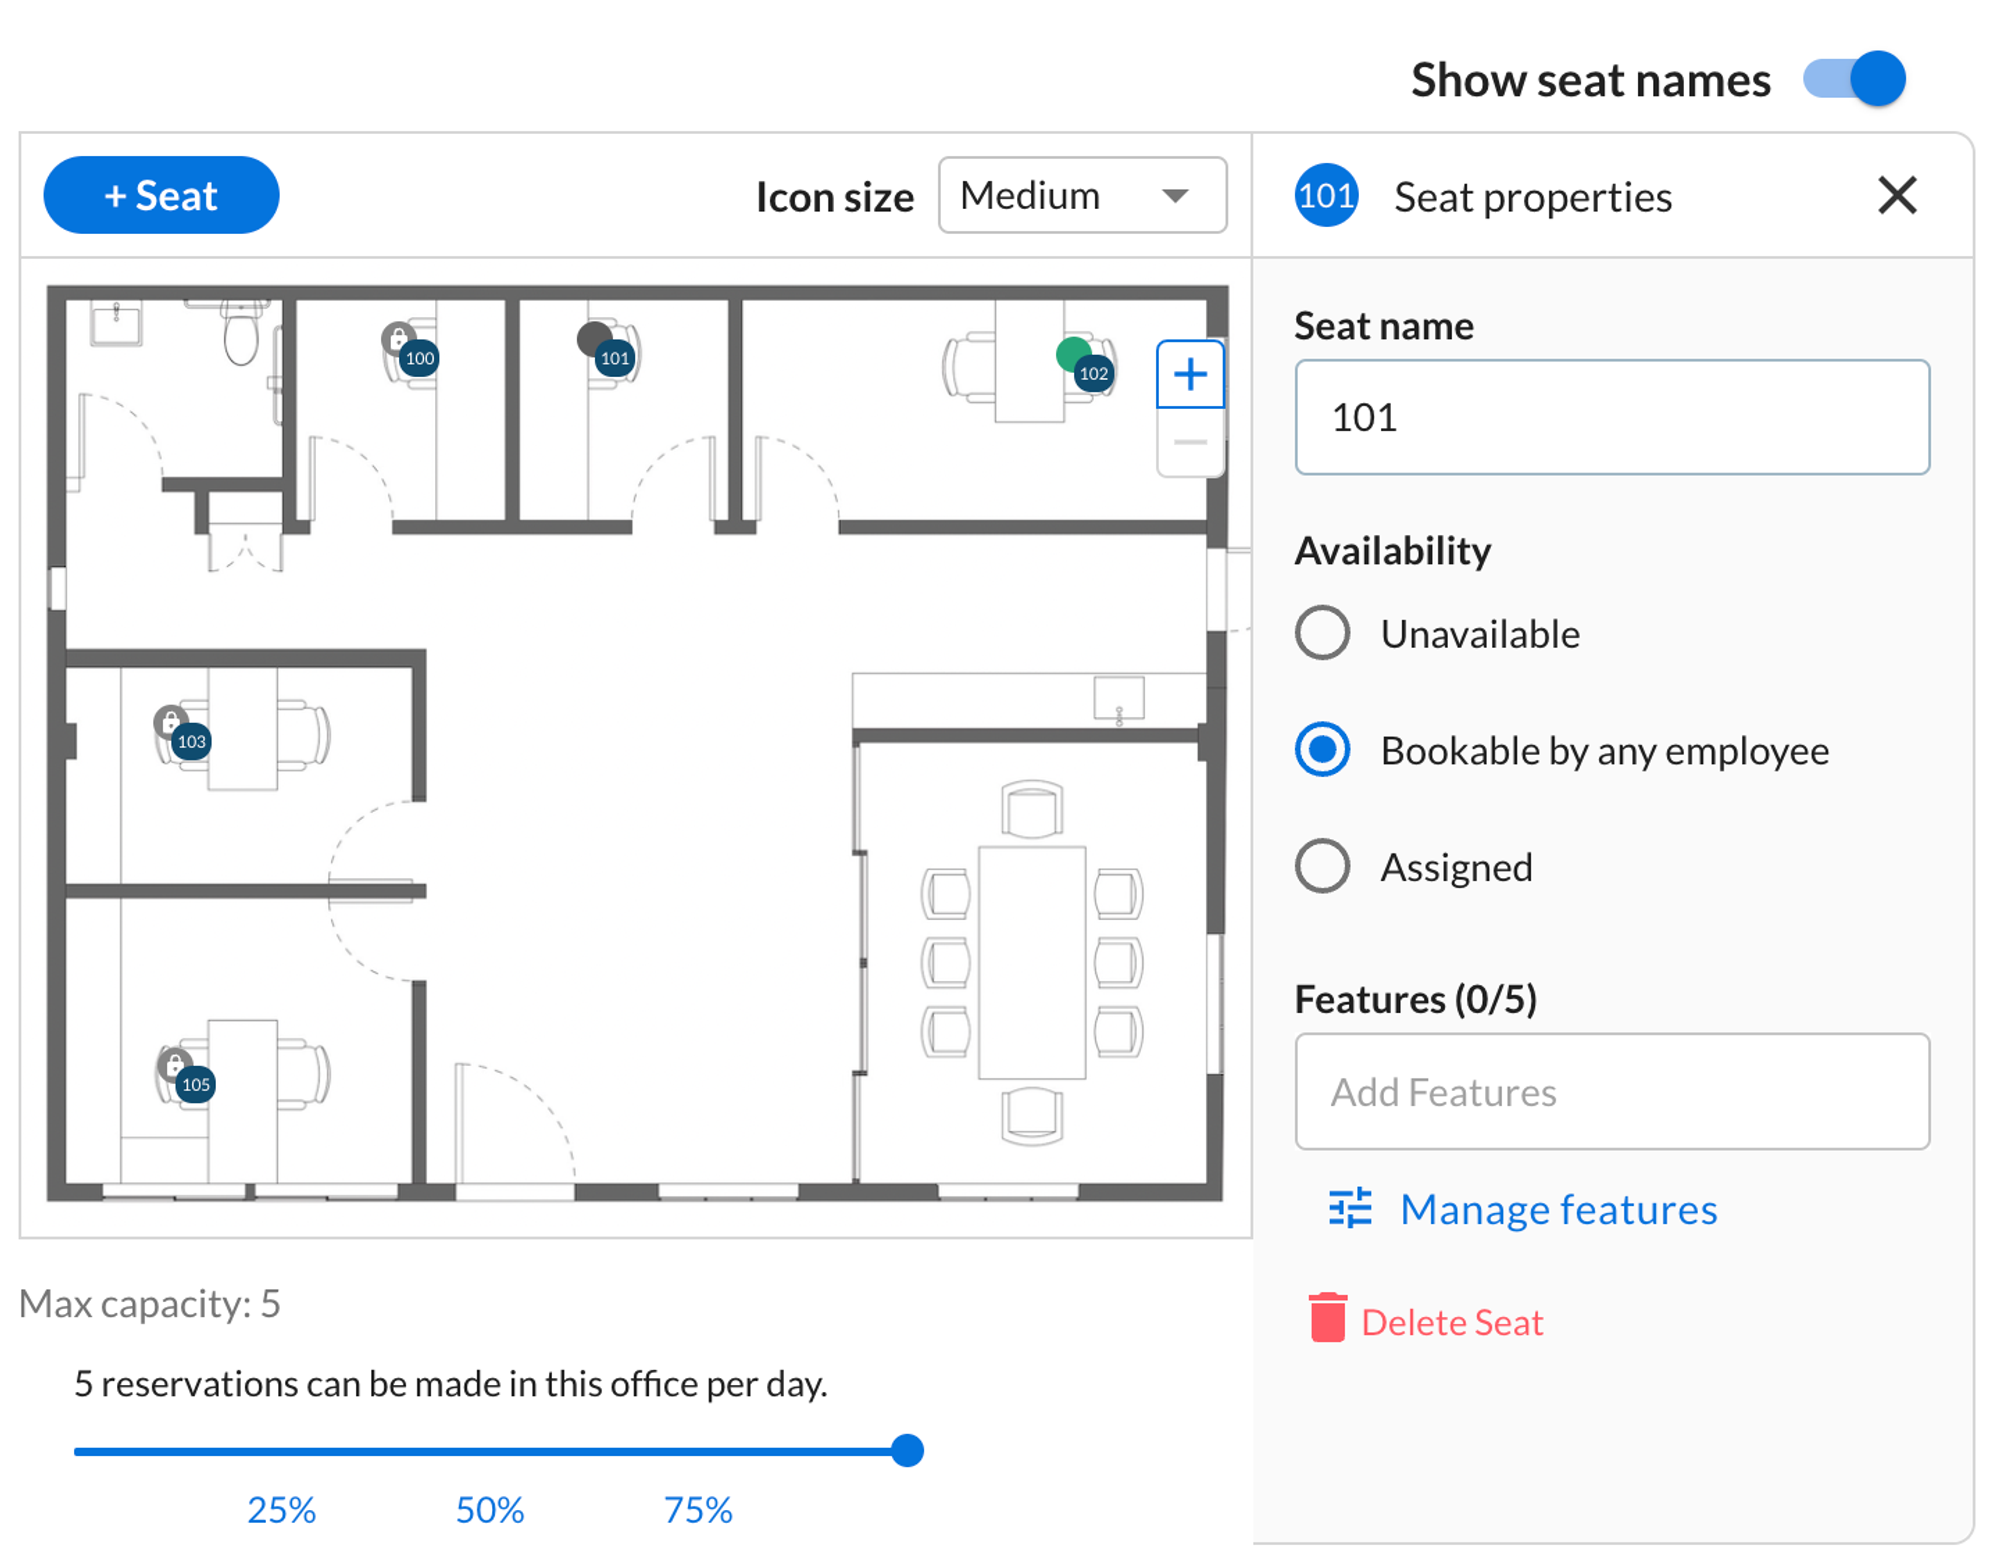
Setting Your Seat Properties
When a seat is selected, you have several options in the right-hand panel:
Seat name: when you select a seat, you can name it (3-character max)
Availability:
- Unavailable - cannot be booked by anyone in the office
- Bookable by any employee - will make the seat available for anyone
- Assigned - you can assign a seat to a specific person or department (by using tags) and only that person or group of people will have permission to reserve it
Amenities:
All seats can be given up to 5 tags that represent amenities for the desk. For additional information on Amenities, visit the Help Center article about this topic.
Have any questions for us? Let us know how we can help.
Email support@officetogether.com to start the conversation!