
OfficeTogether can integrate with Google and Outlook resources to show your meeting room calendars inside the portal. The directions below describe how to initially configure your meeting rooms as well as book them. NOTE: If you want to use this feature, you must contact ‘support@officetogether.com’ to have the Meeting Rooms tab enabled.
Meeting Room Setup
Once you have a floor plan uploaded to an office in your Settings, you will see a “+Room” button on the edit page for modifying seat placements.
- Press the ‘+Room’ button to add an icon to your floor plan for a specific meeting room.
- Once the room icon is added, click the icon to show the right-hand configuration panel.
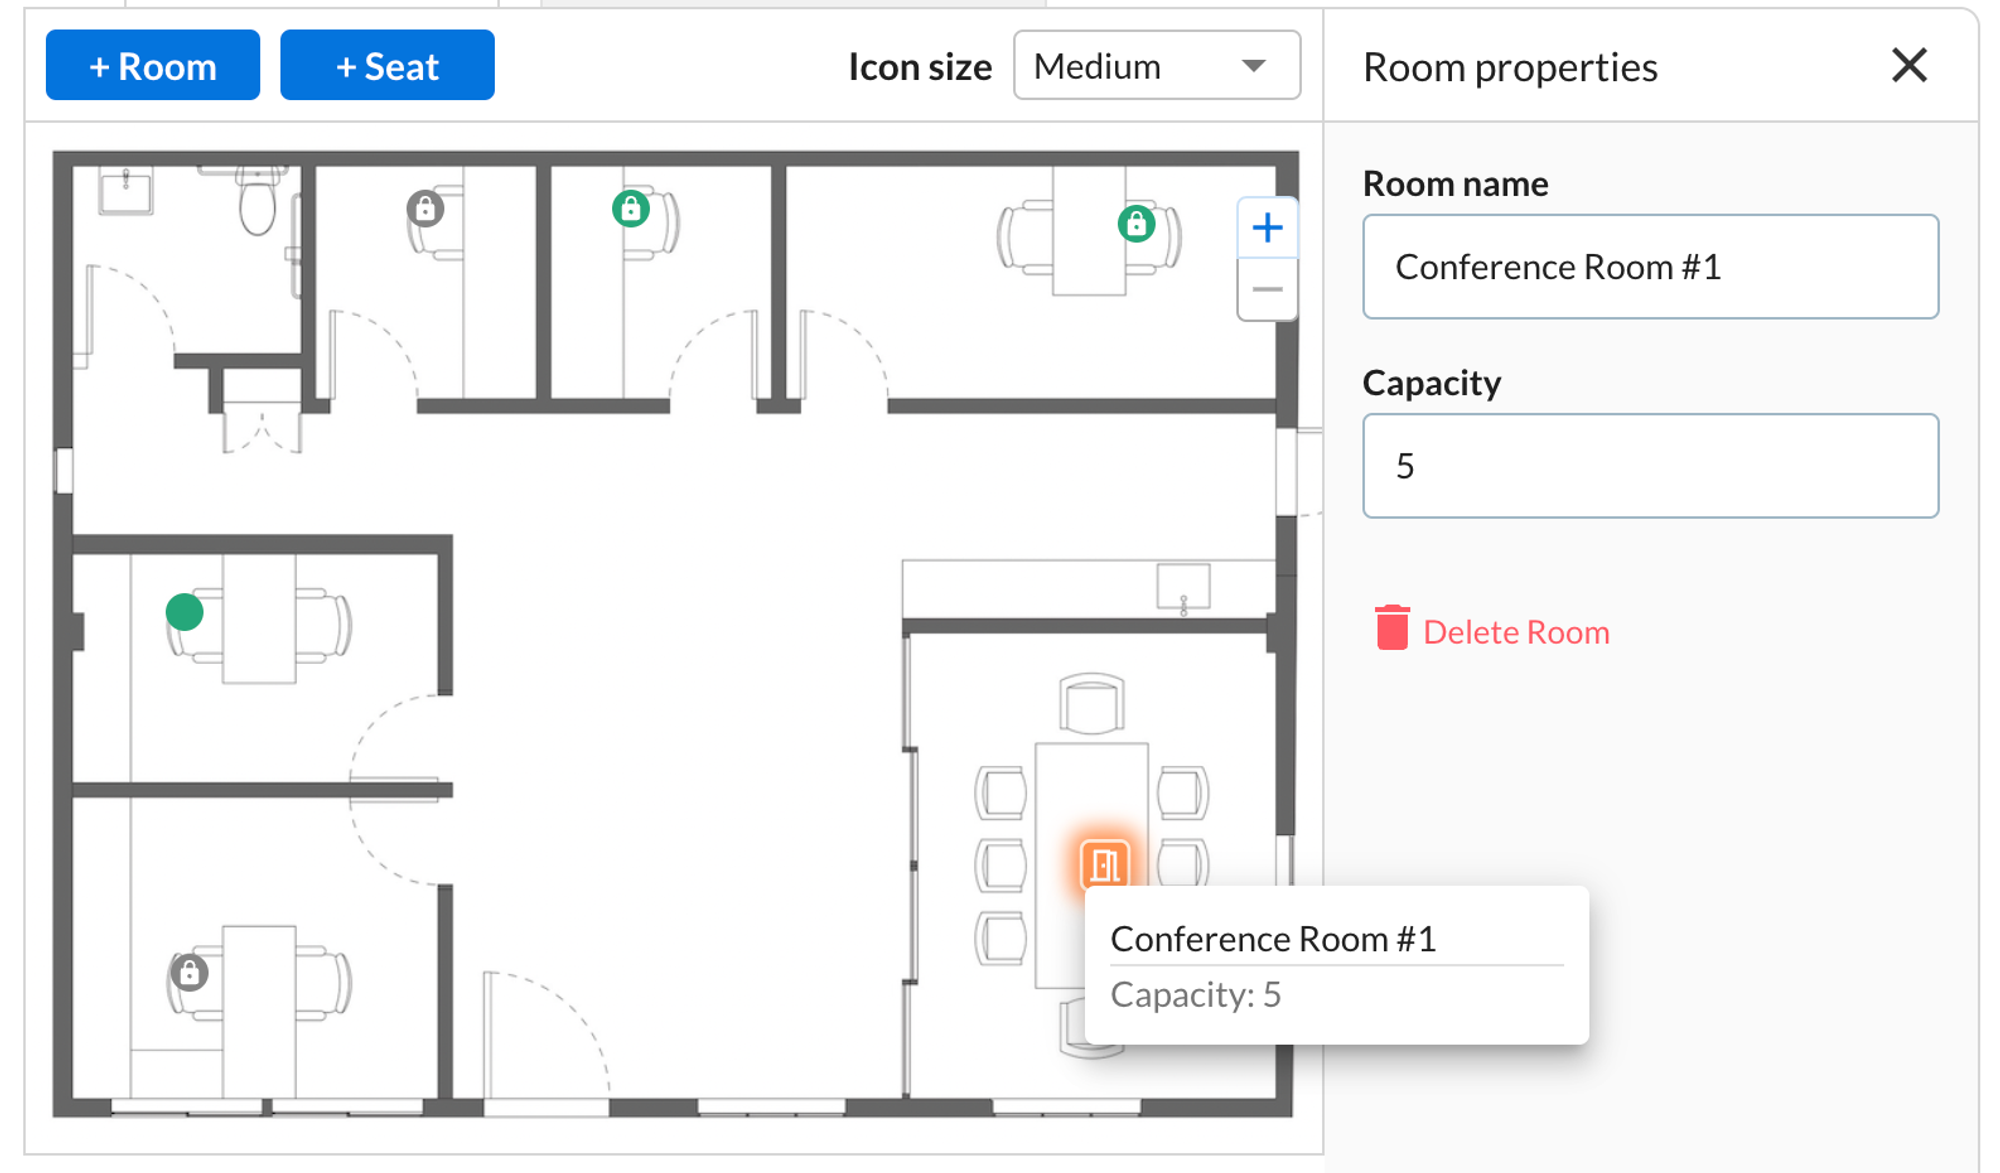
- You can view the original properties of the meeting room, ‘Room name’ and ‘Capacity’ from the panel. These will be updated automatically later when the room is connected to the proper Google or Outlook resource.
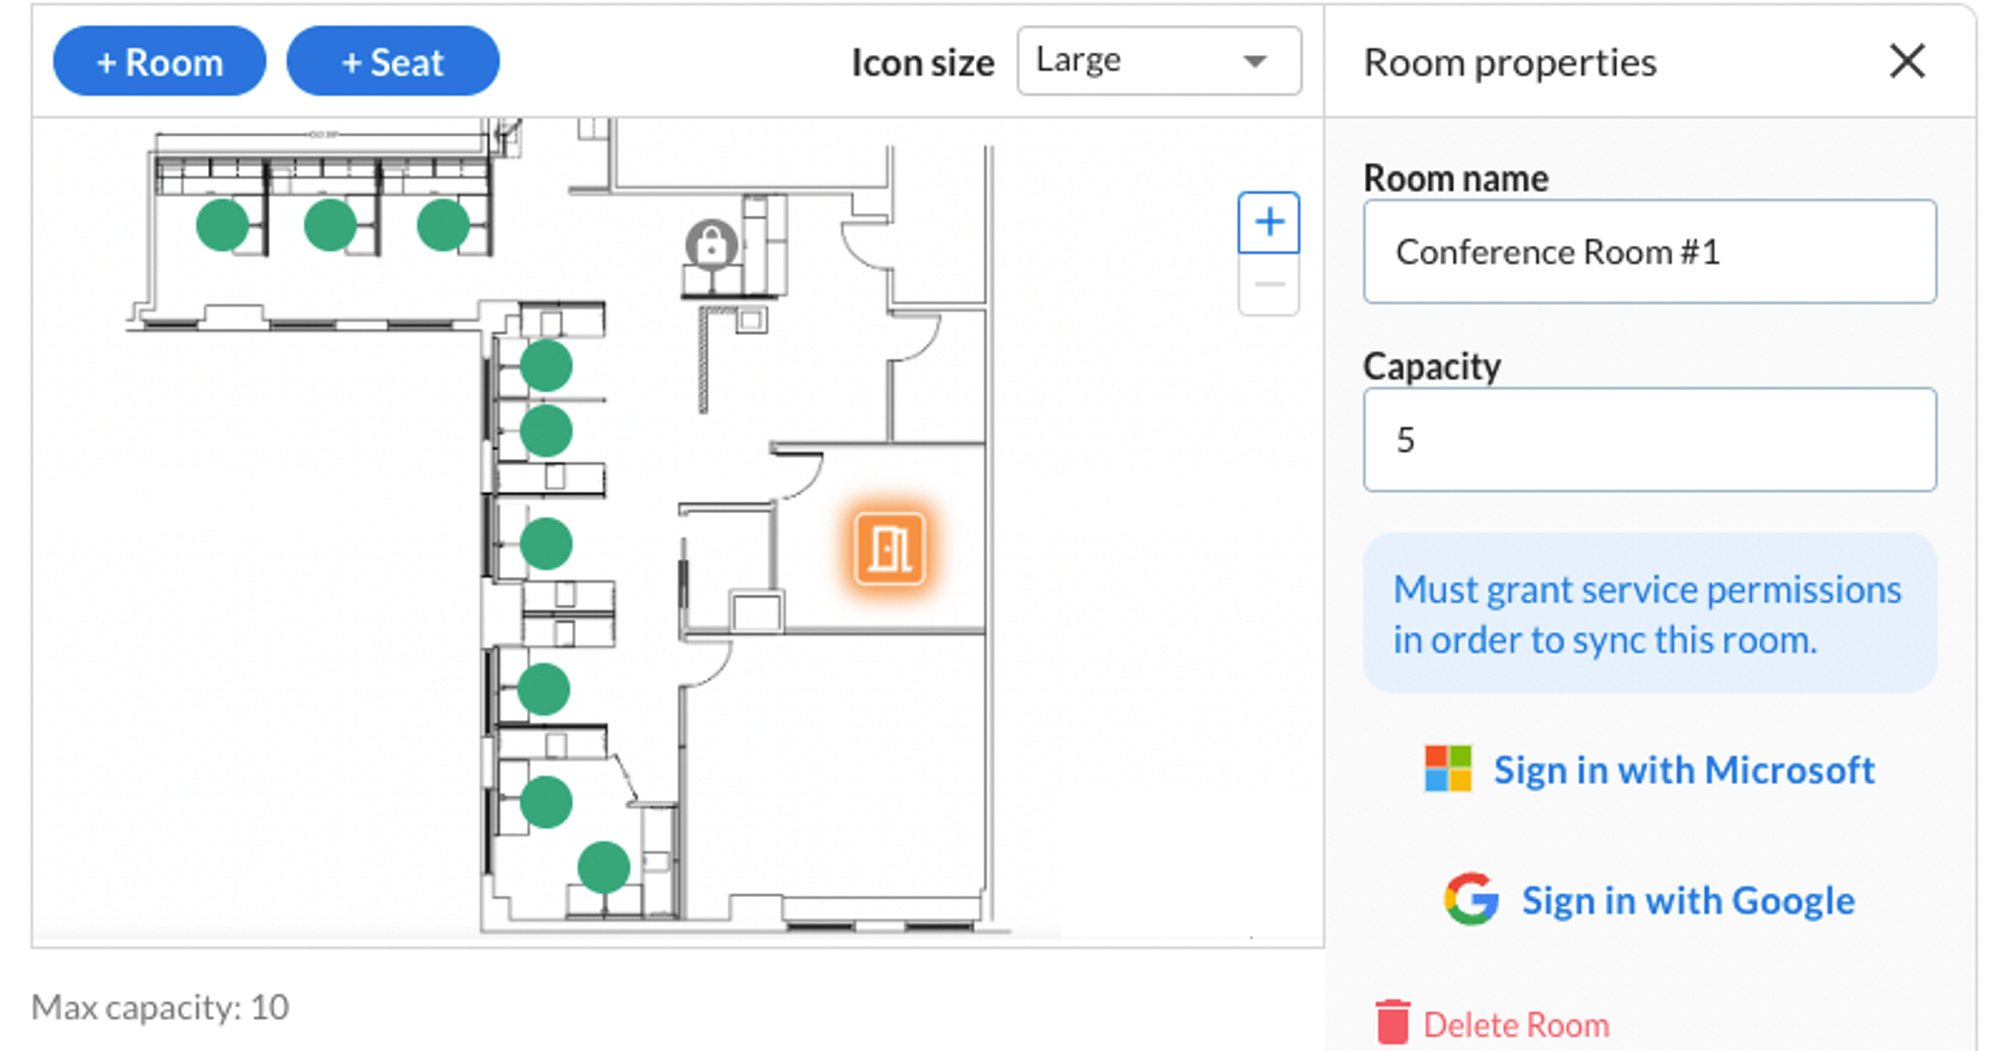
- In order to complete the setup, an IT administrator will need to use the
Sign in with MicrosoftorSign in with Googlebutton and connect your team’s resources with OfficeTogether’s portal. NOTE: This only needs to be done once.
- Once you have the list of Google or Outlook resources available from your company’s office, you can map them to the correct rooms on your floor plan.
- Be sure to click ‘Done’ above the floor plan map to save your changes.
Meeting Room Usage
You can use the Meeting Rooms feature to view the room’s calendar and book appointments. Here are the steps to getting started with the Meetings Room tab.
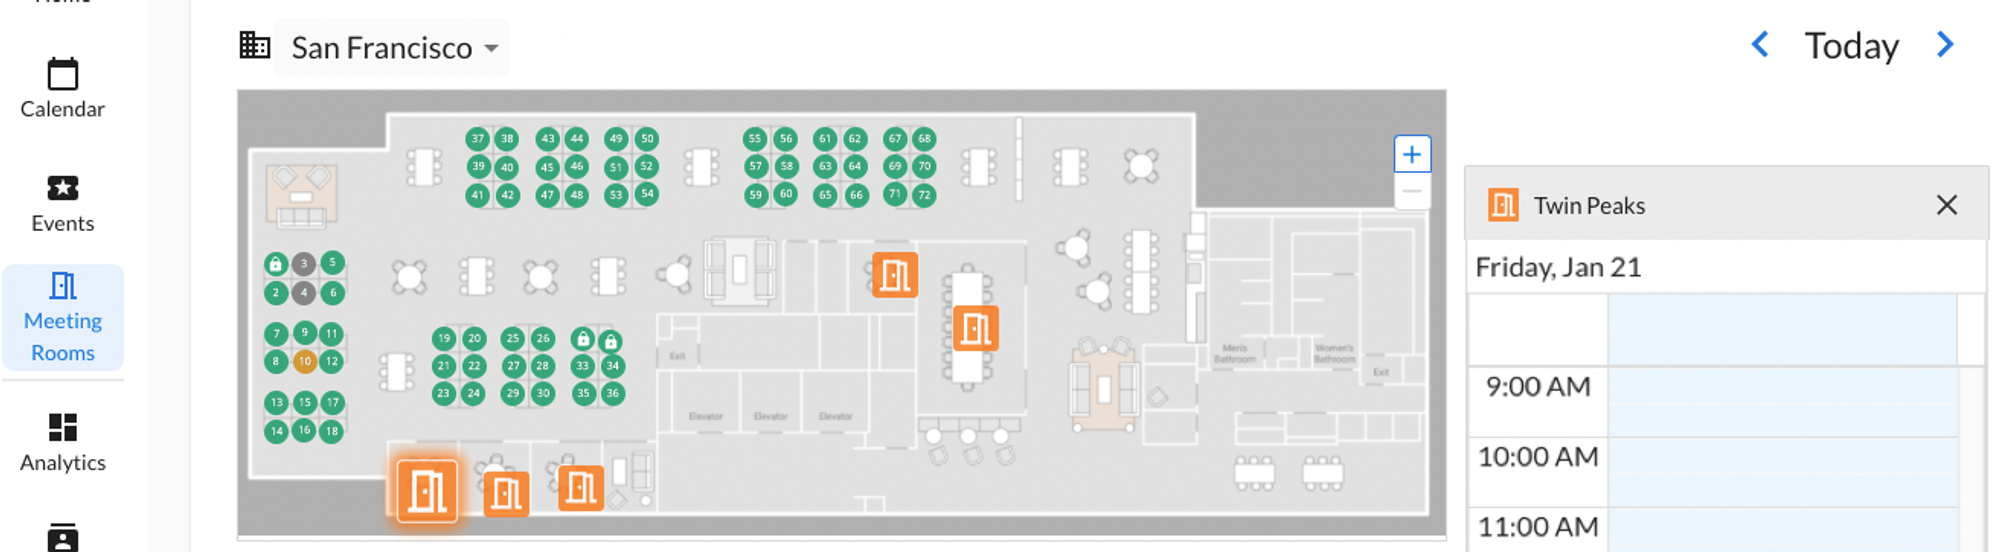
- From the left-hand navigation, choose Meeting Rooms.
- You will see the floor plan of your Default Office with the icons for both seats and meeting rooms.
- Find a meeting room that you want to view and click on the icon. You will see a right-hand panel open up with visibility into the meeting room usage.
- If you want to add an appointment to the calendar, you can click into the appropriate time slot in the calendar section and a pop-up window will ask you to provide a title.
- Click ‘Save’ to save the new meeting and you will be prompted to ‘Continue in Google Calendar’ or ‘Continue in Microsoft Outlook’. This button allows you to make additional changes to the meeting, including guests. NOTE: If you created the meeting, you can also select and use the trash can icon to delete it.
- If you have multiple meeting rooms in your office, you can quickly highlight each of them to view their current bookings.