
Give staff more information about each desk
Let’s step through how to add specific amenities to each desk!
- Floor plans are configured from the Settings area. Click ‘Settings’ from the left-hand navigation and then click the name of your office to get started.
- After selecting your office, you need to navigate down on the page to ‘Seatmap and Capacity’. You will see the main floor plan image with the icons for seat placements and meeting rooms. By default, you are in the ‘Edit’ mode of the floor plan.
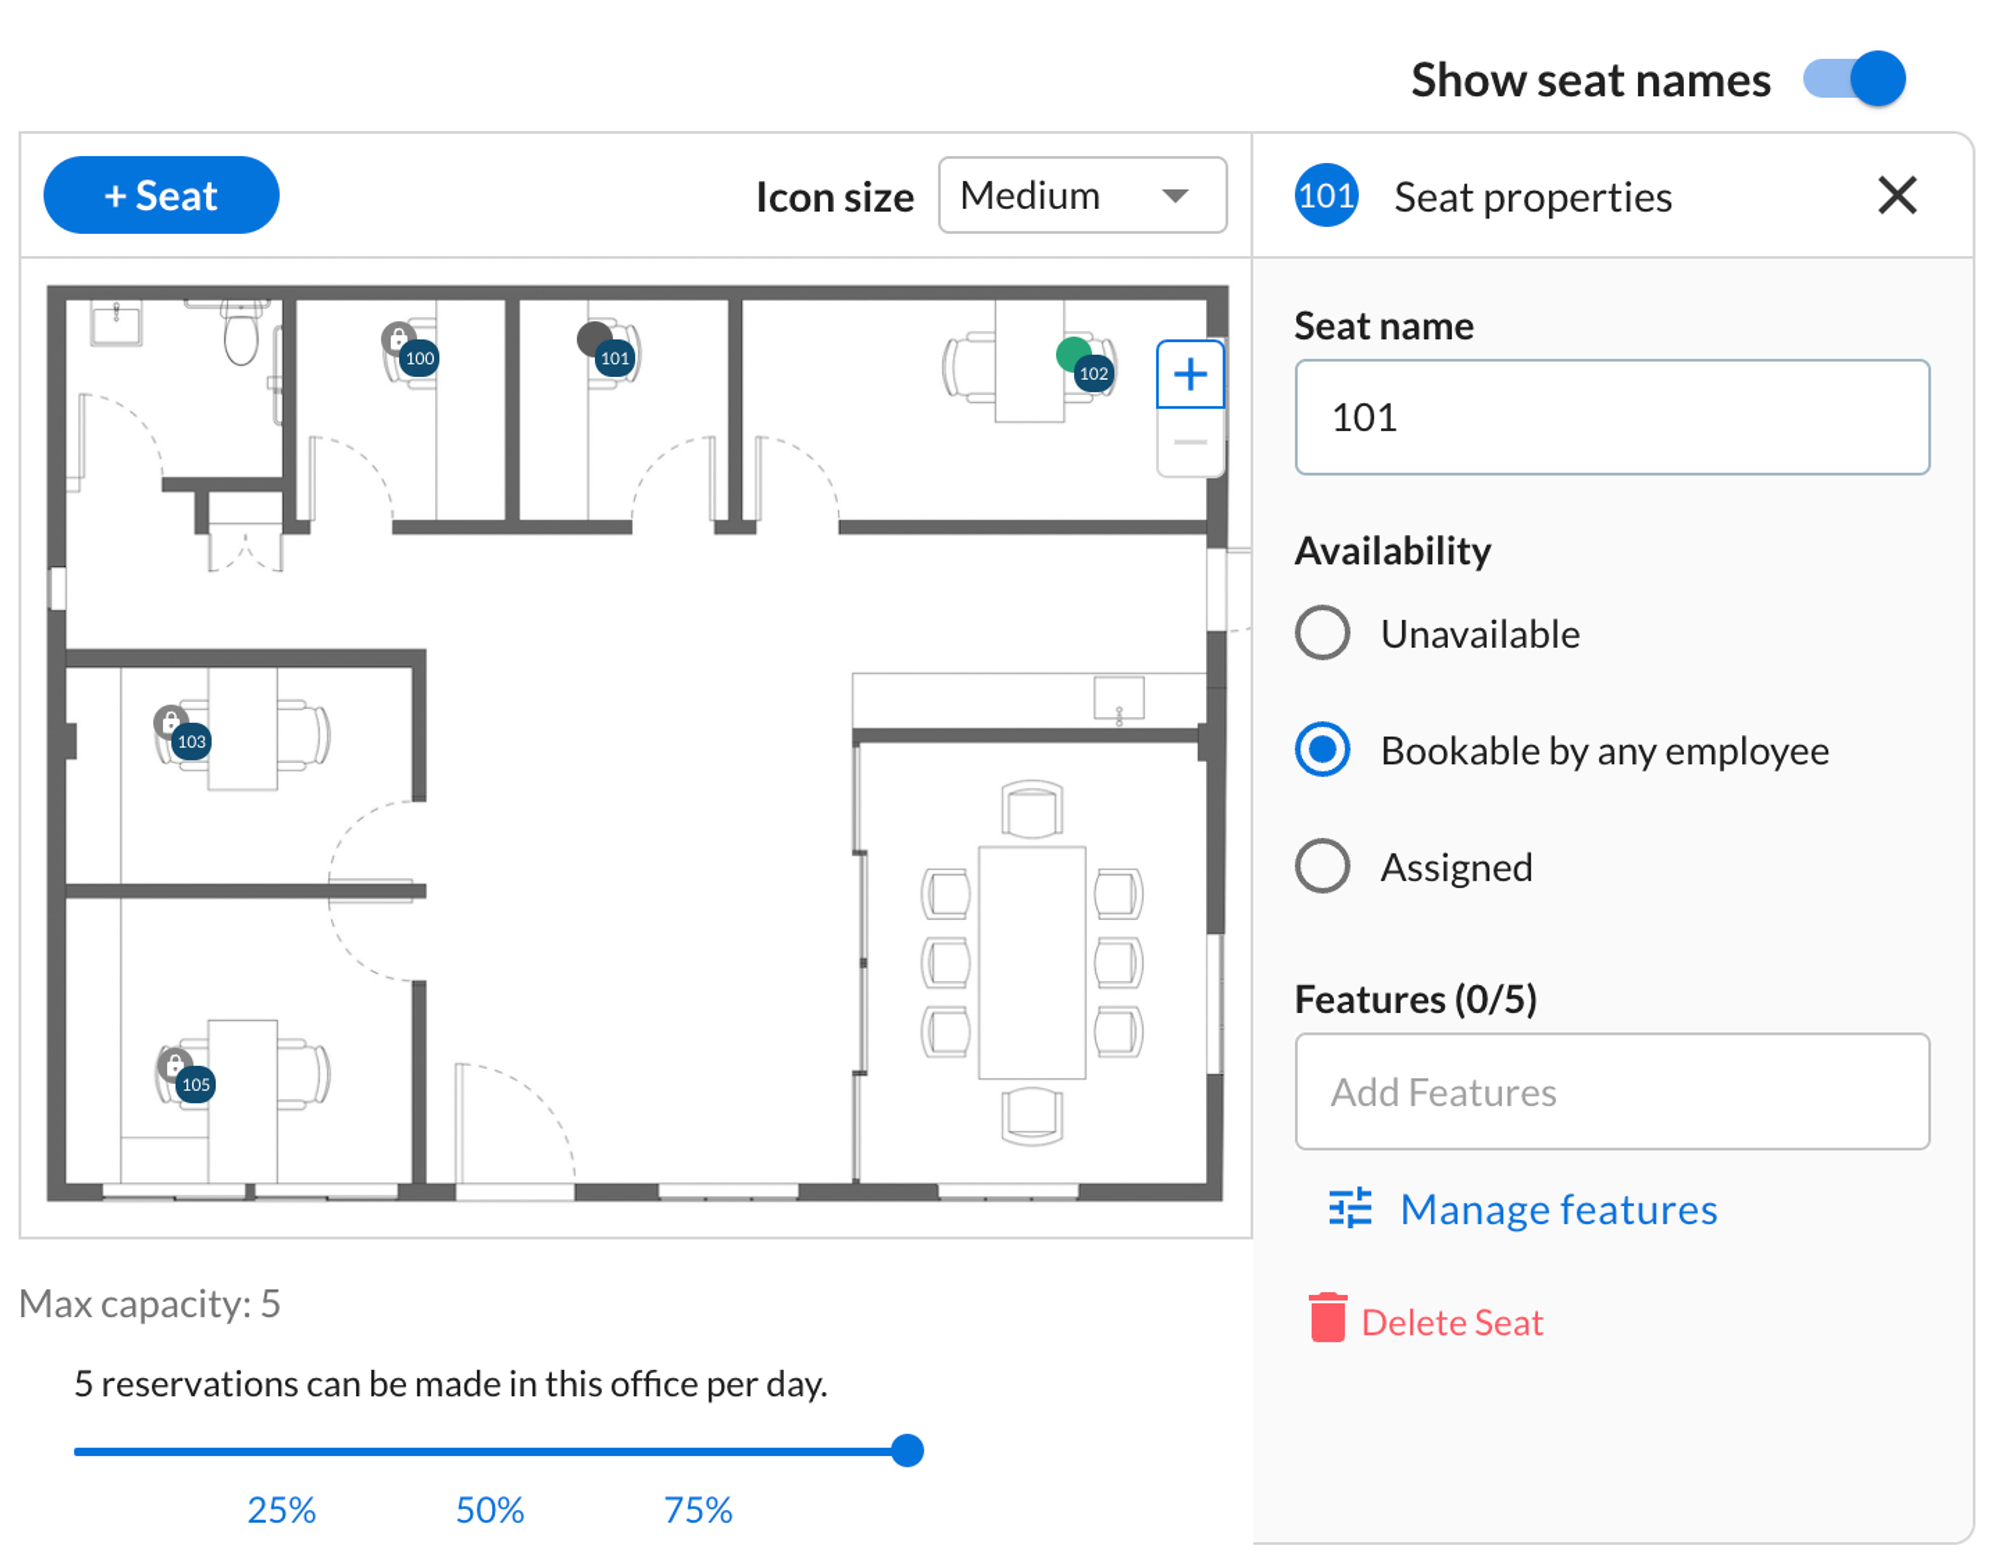
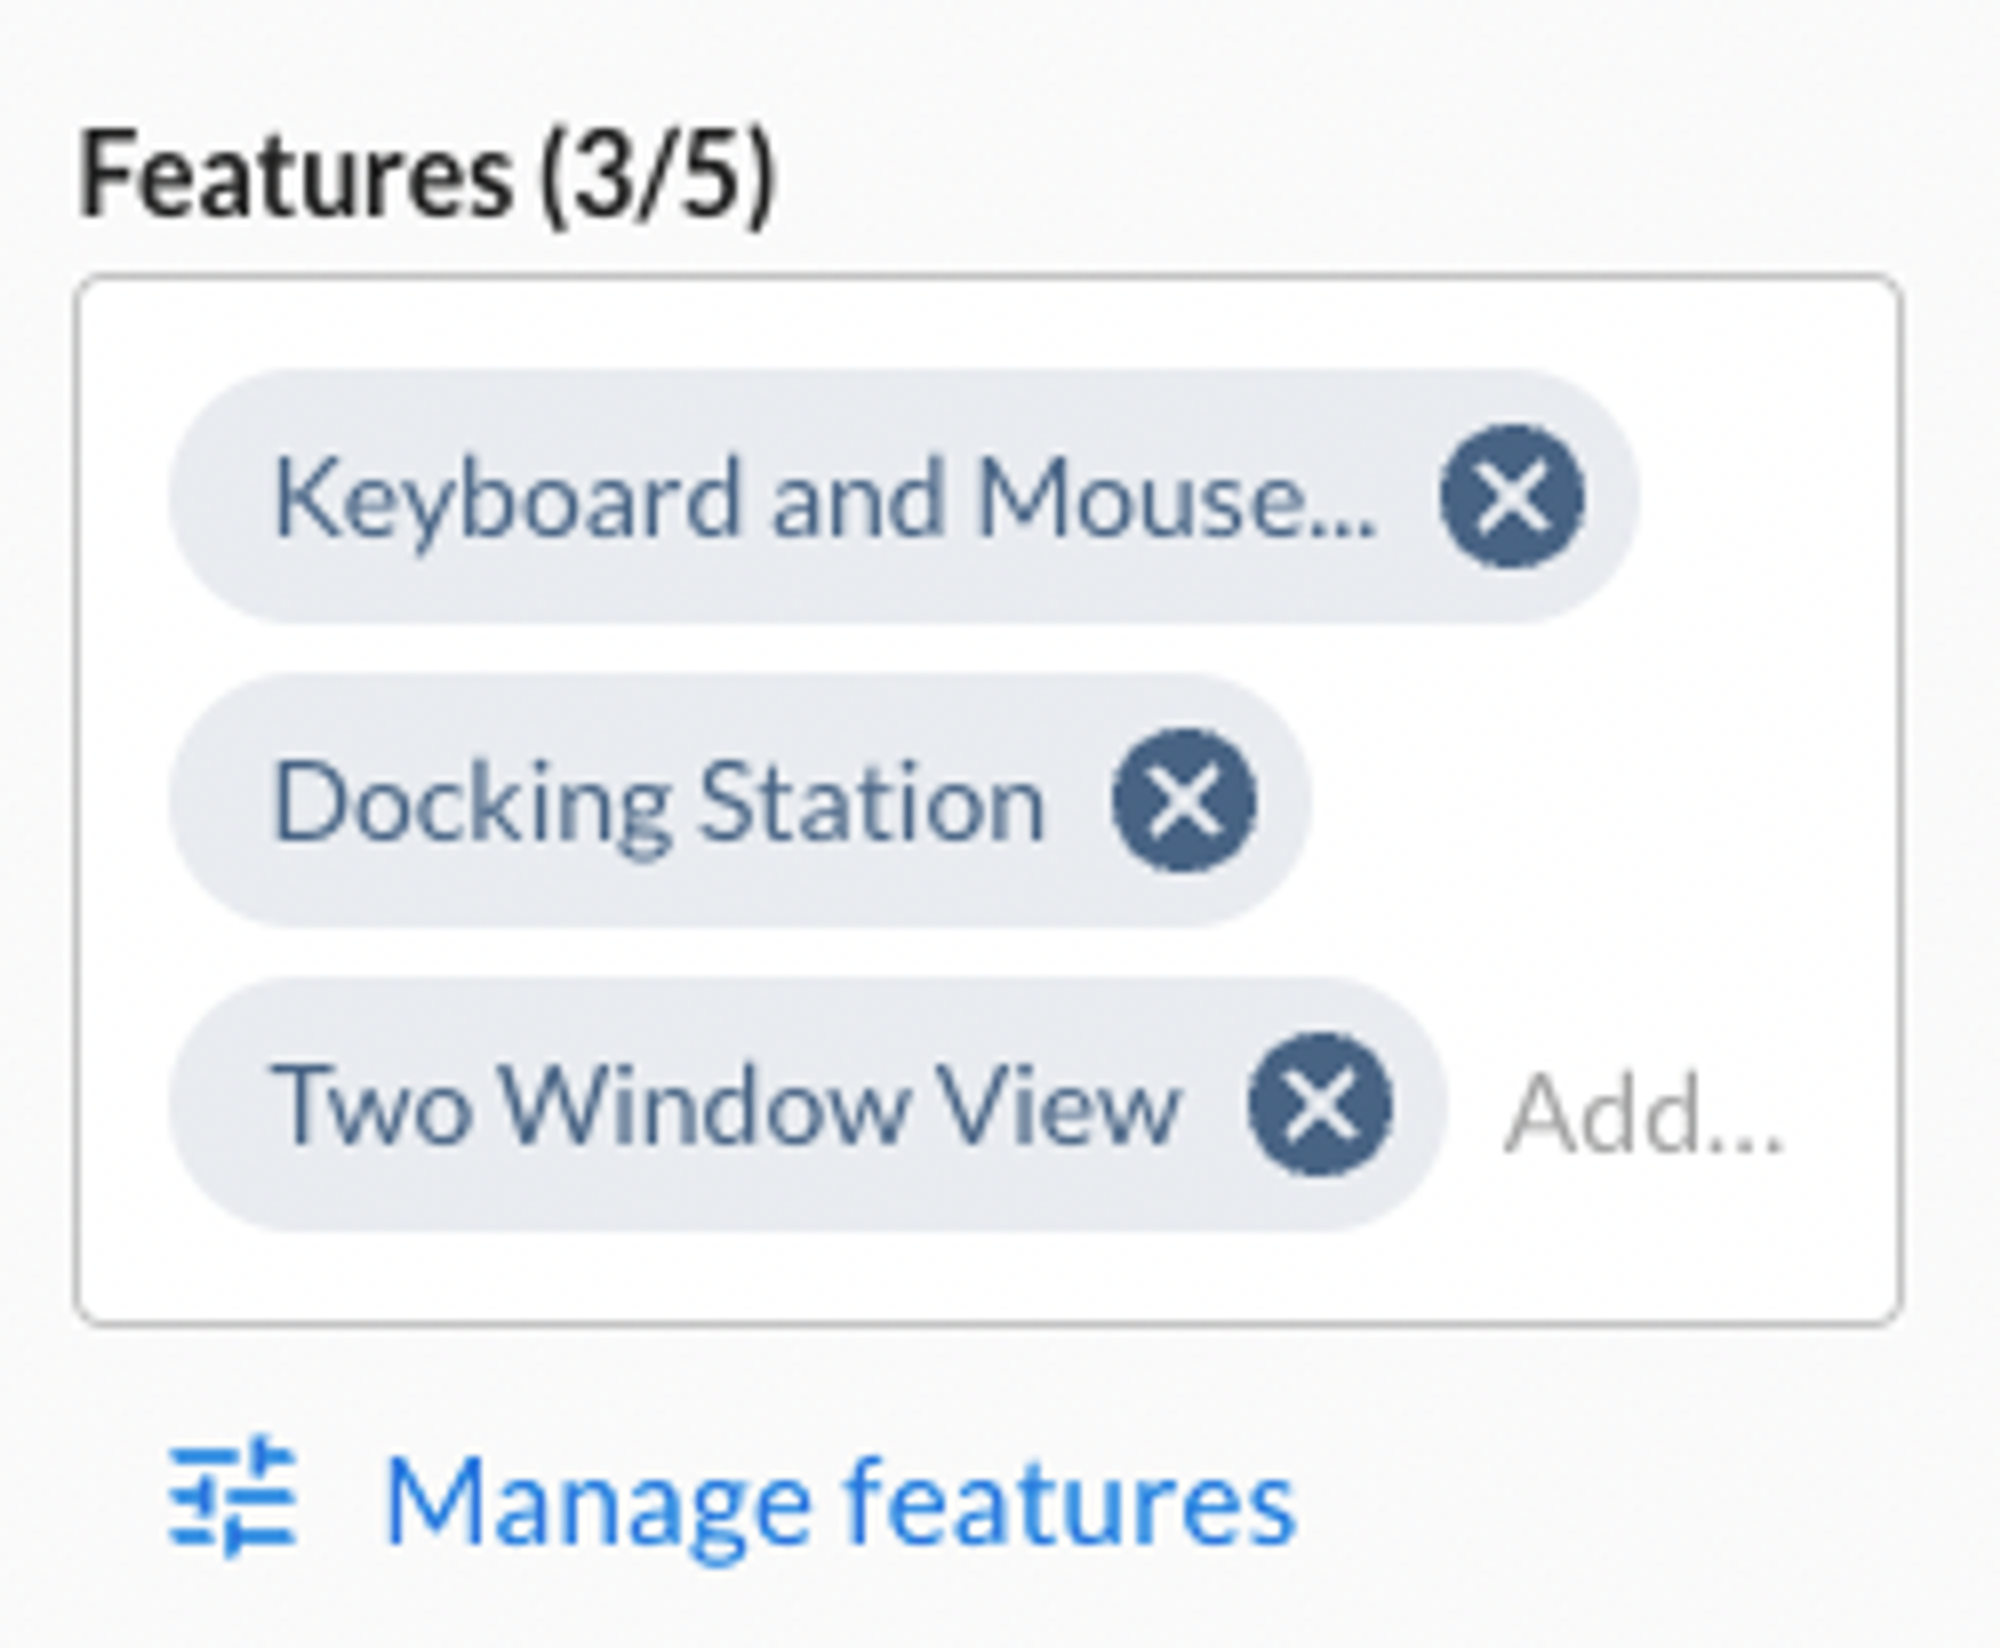
- To the right of the floor plan image are the ‘Seat properties’. Each seat has a name, availability and also ‘Amenities’. Amenities are useful for adding hardware and software specific information about a seat.
- To get started, click the ‘Manage amenities’ link under the ‘Amenities’ section to add tags.
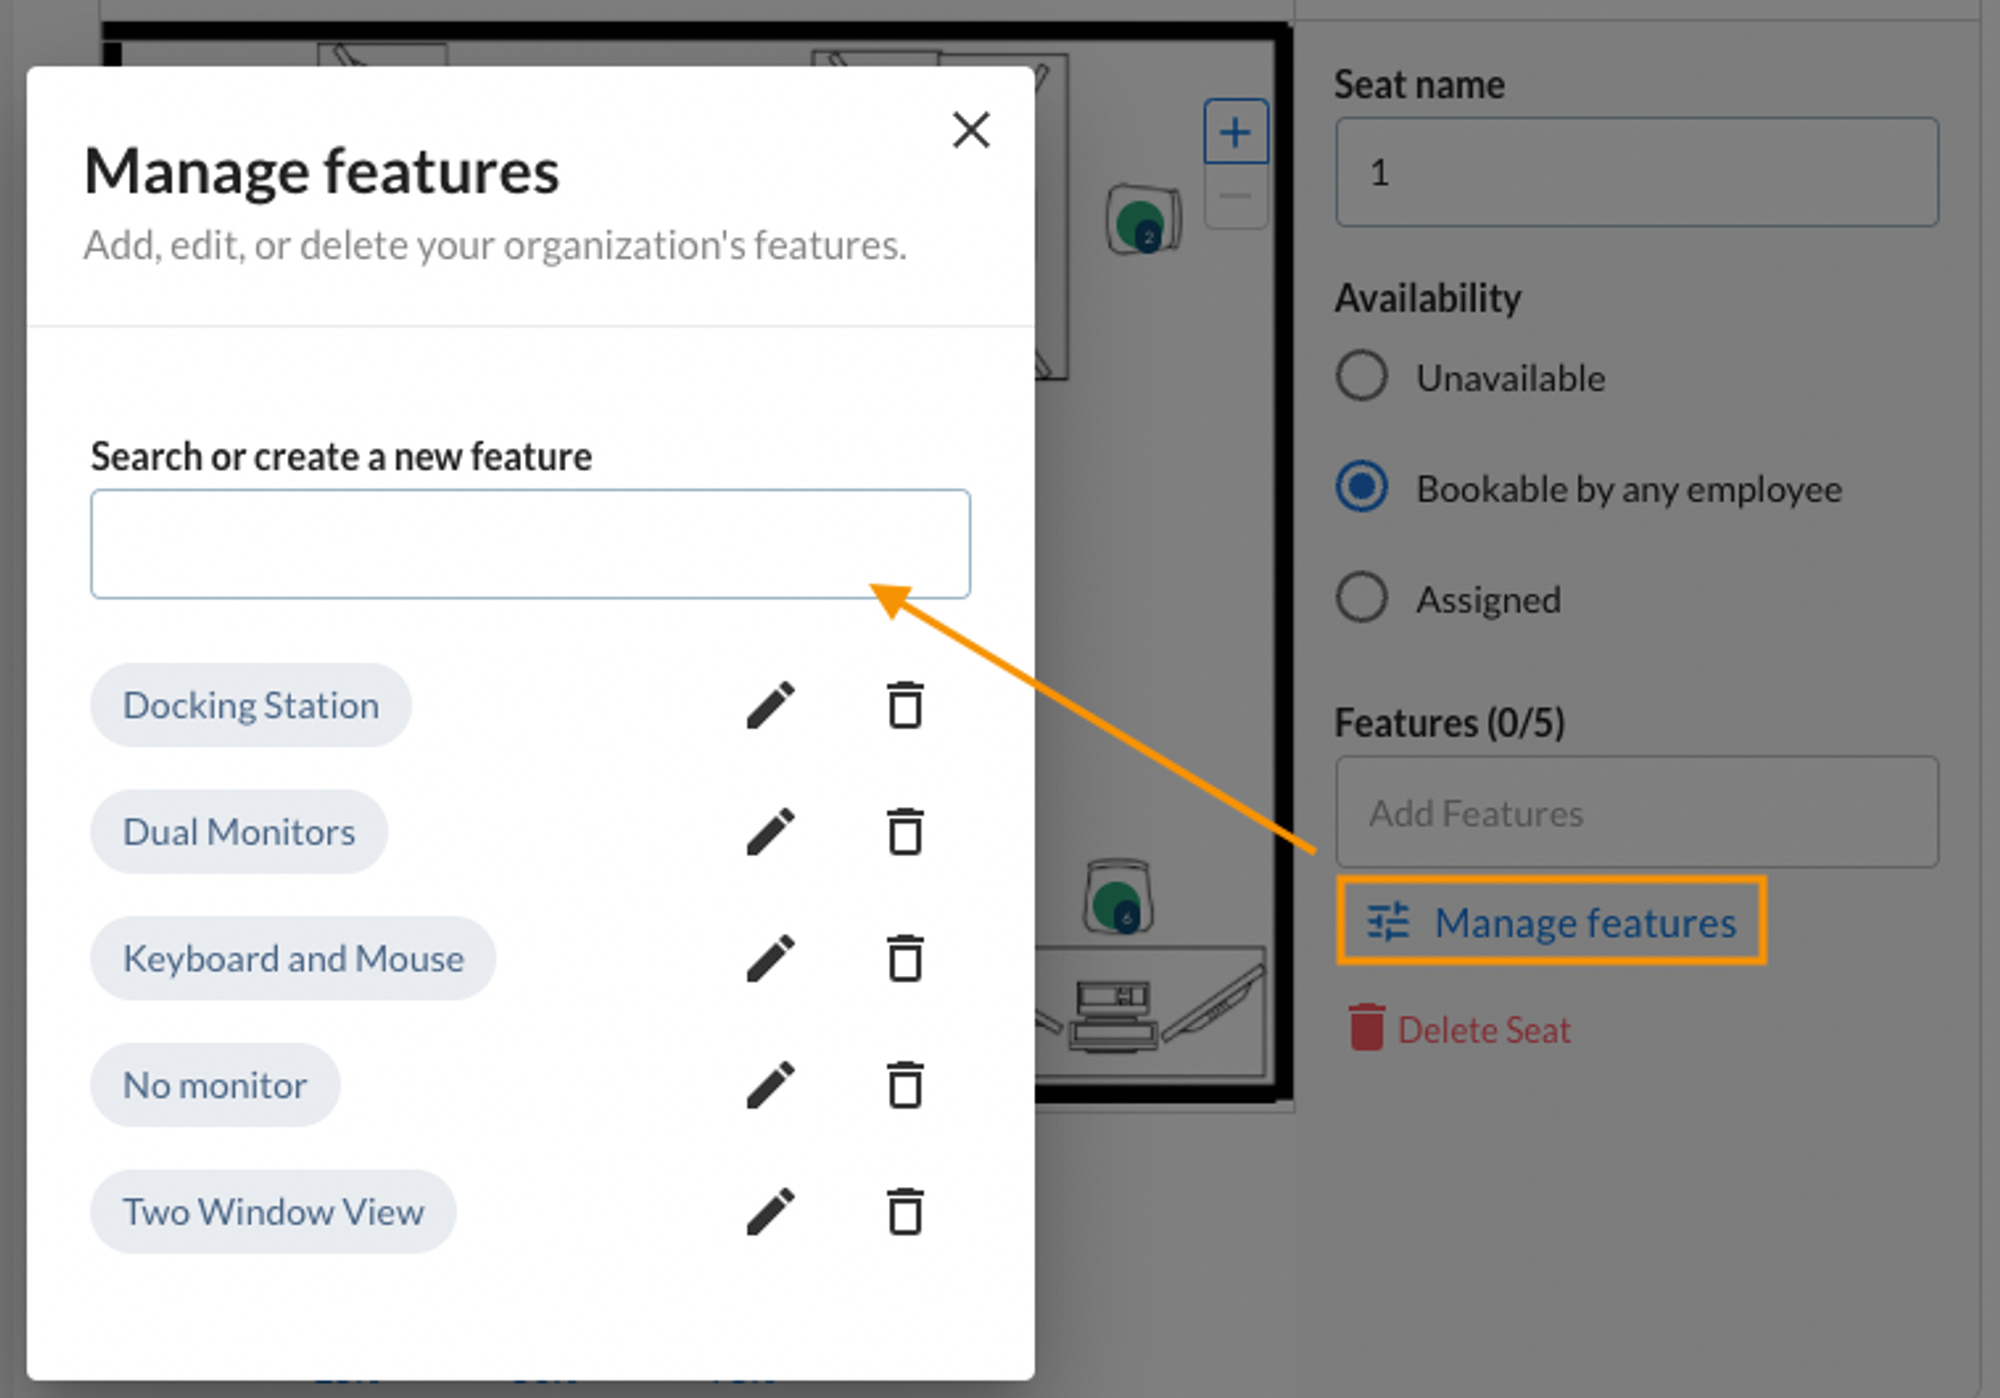
- Add a name of a new amenity, such as ‘Dual Monitors’ and click the ‘+’ to add it to the list. Create a full list of amenities that you want to add to any desk within your floor plan. Each desk can only have up to 5 amenities, but there is no limit to the number of possible amenities you can have available.
- Next, add the appropriate amenities to the various seats.
- Once complete, please don’t forget to press the ‘Done’ button above the floor plan to save your changes.
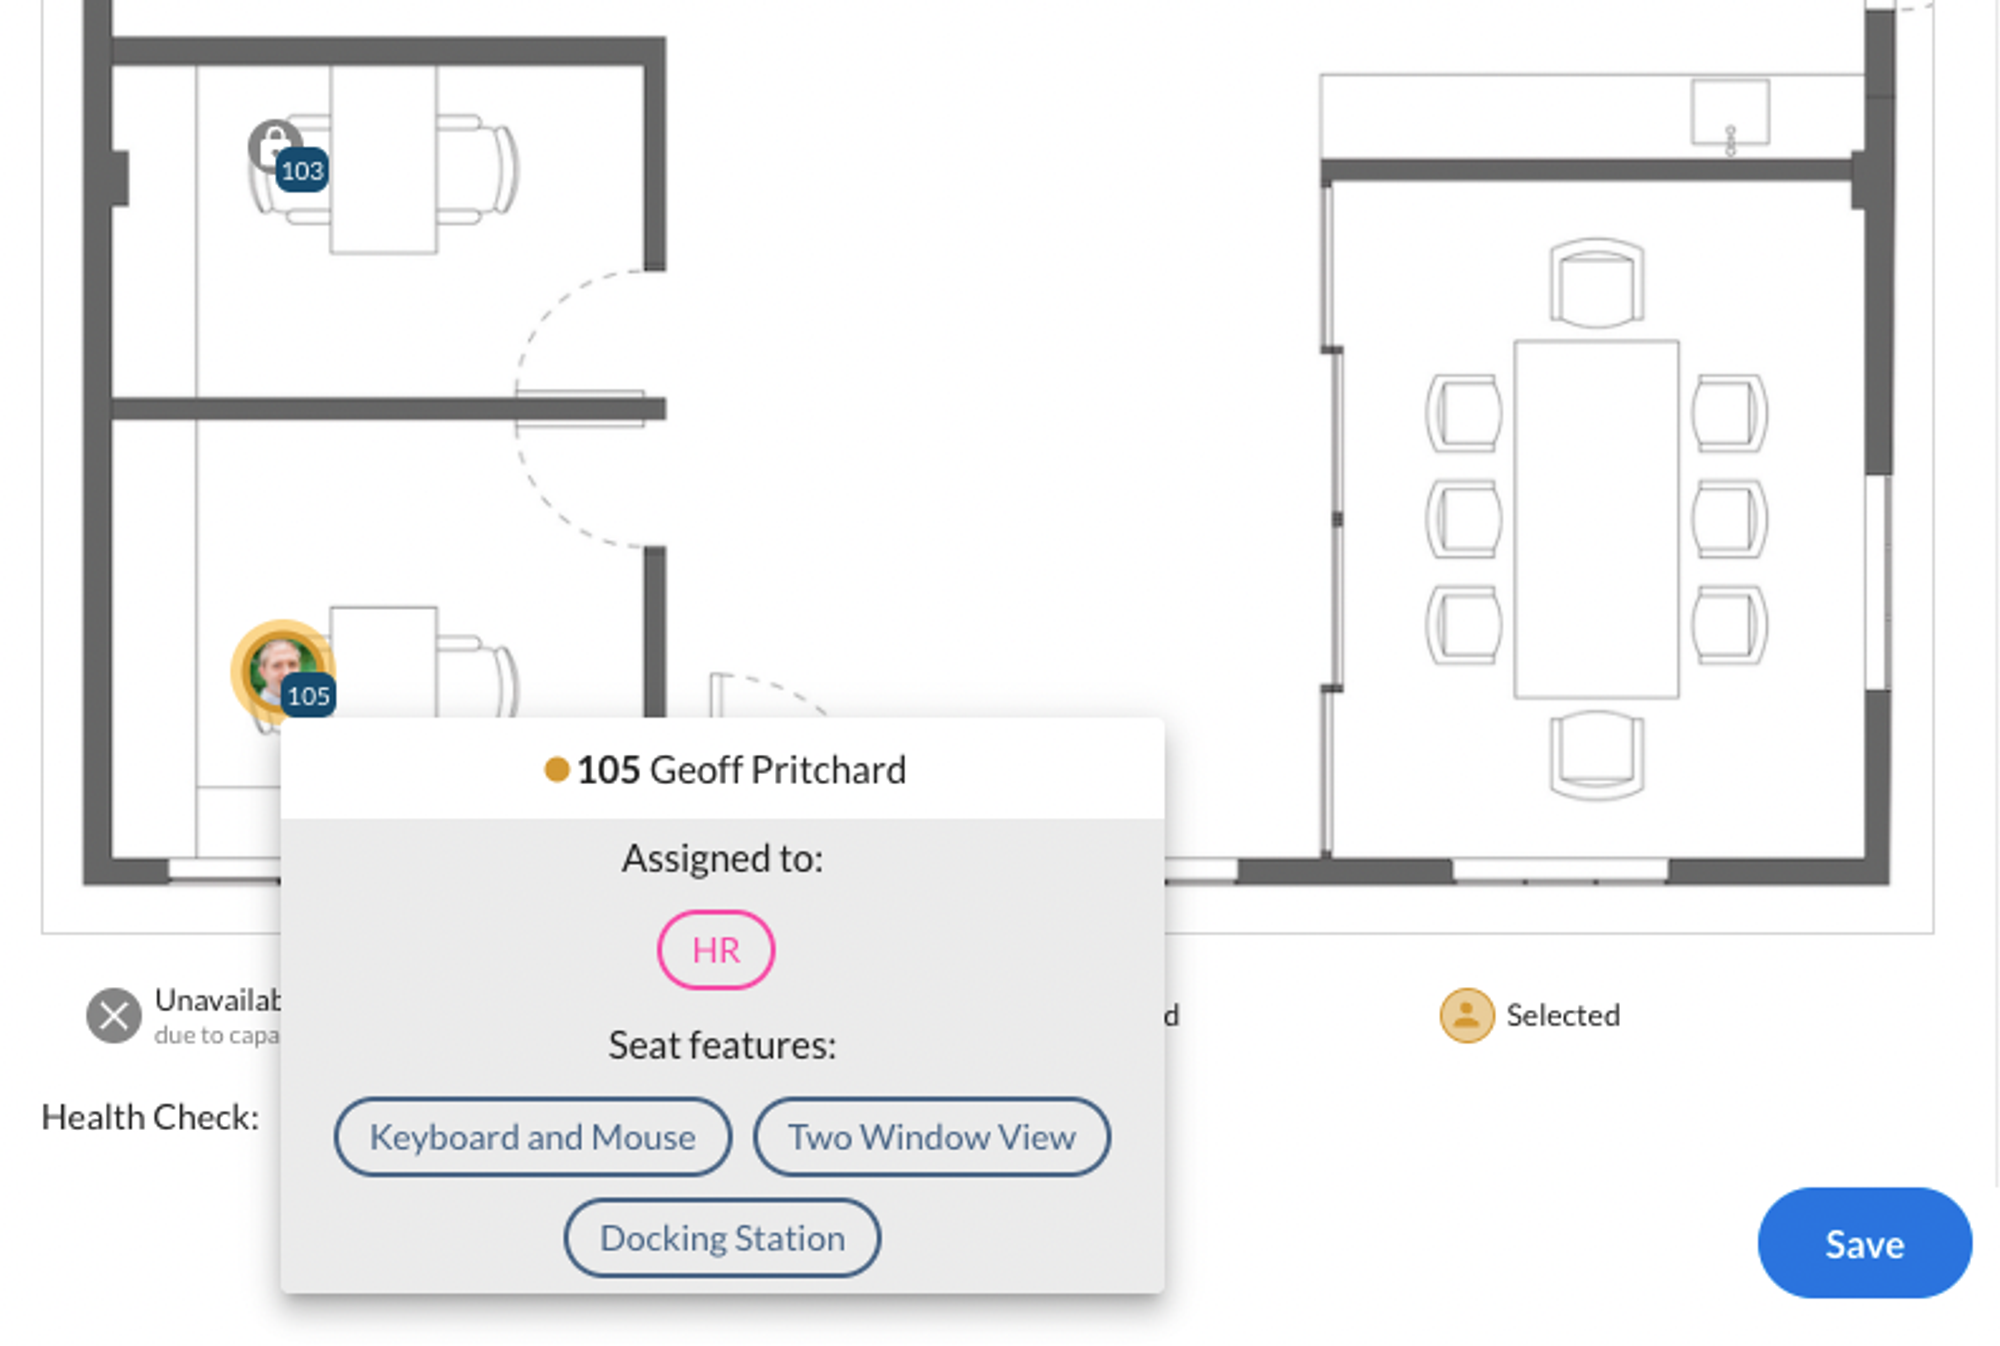
- When staff look to find a desk in the floor plan, they can hover over any seat and see the various amenities before booking their selection.
Coming soon! We will soon have the functionality to search by amenity when booking a seat so that staff can easily locate the proper desk for their working needs.
Have any questions for us? Let us know how we can help.
Email support@officetogether.com to start the conversation!