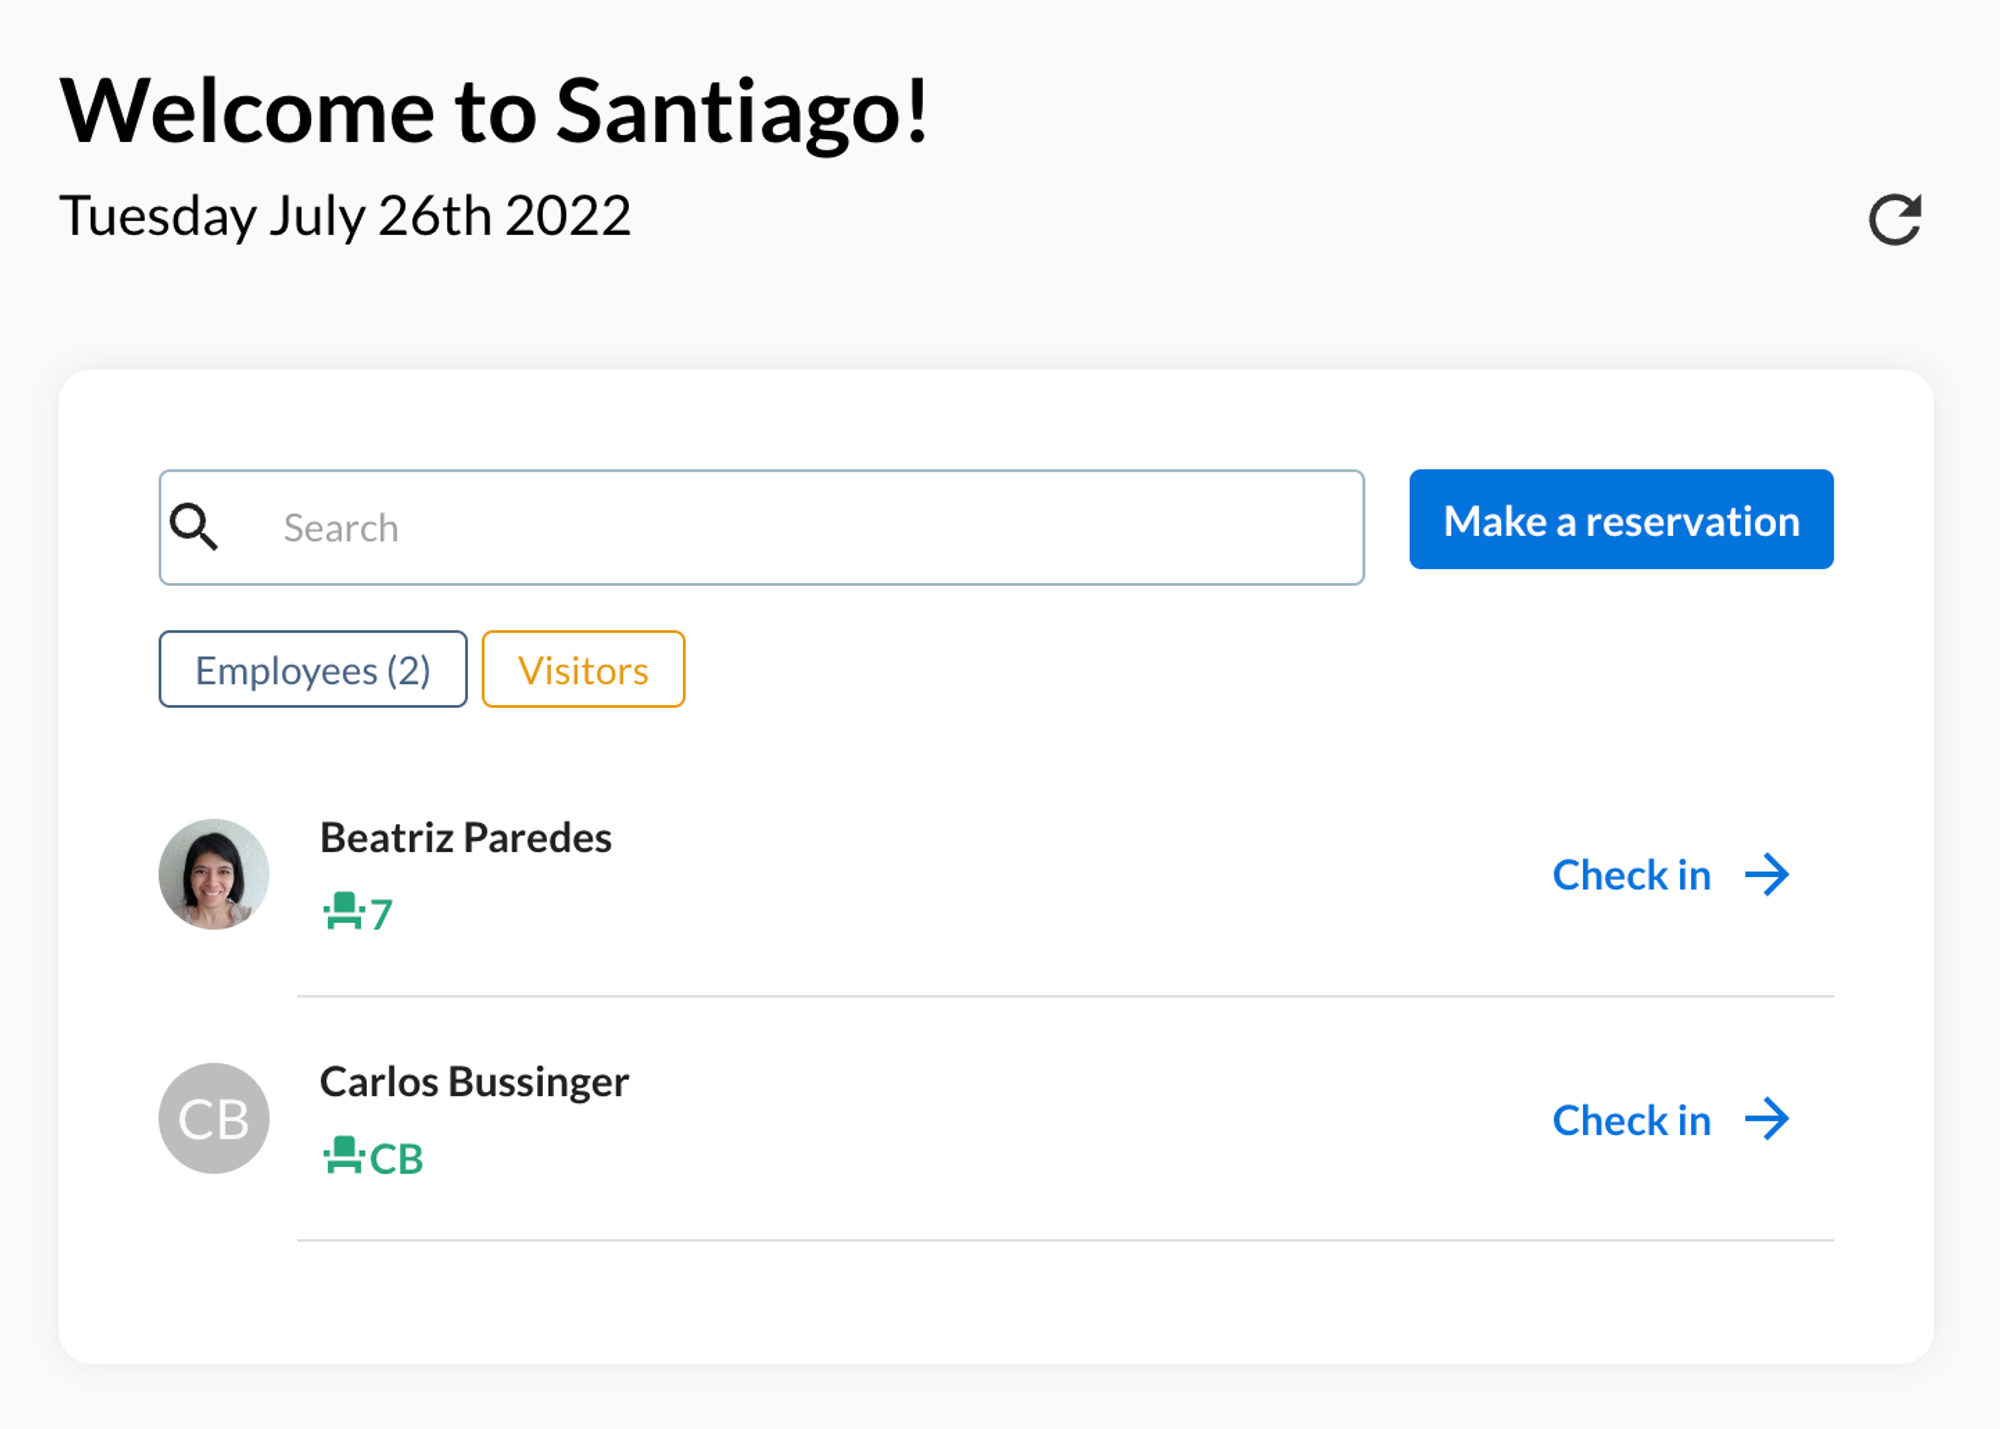
View the Check-in Page
OfficeTogether has a specific check-in page available for each office. In order to view the check-in page, you will need to have admin rights.
- Go to Settings → [Office name], and choose the office you want to view
- At the bottom of the Office settings page, click ‘Generate your tablet check-in URL’
- You will then see the link modified to ‘Copy link to the tablet check-in page’. Click this button to copy the unique URL.
- Open a new tab in your browser and paste the URL. This page will show all of the reservations for that specific day and allow each staff member (or visitor) to check in.

- Staff will simply need to press ‘Check in’ to confirm that they’re physically in your office. This helps your team guarantee that the desk reservations match the employees who came into the office.
Set up Check-in Tablet Devices
If your office has a minimal number of entrances, then setting up a tablet (iPad, etc) by each entrance can be useful. The tablet only needs a web browser to access the OfficeTogether check-in page, so any inexpensive tablet device will work. The goal of the tablet is to make sure that staff actually show up on days that they’ve made reservations and that staff who forgot to book ahead of time might be encouraged to use the tablet to add themselves.
If an employee needs to make a reservation at the tablet:
- Click ‘Make a reservation’
- Search and then select your name in the text box
- Once the name is selected, you can choose a particular seat, accept a health check (if applicable) and confirm the check-in.
Download Check-in Data
All of the information on the check-in page can be downloaded from the Analytics page.
- Go to Analytics and choose the appropriate office(s) of the data you want
- Set the Date Range to the time period you want. If you want a custom range, choose ‘Select from calendar…’
- The data on the screen will change based on your date range
- In order to view the check-in data, go to the bottom section ‘Export CSVs of Work Statuses’
- You will want to choose the ‘All work statuses occurring between’ option and download the CSV report
- Once you open the report, you can view the ‘checkinAt’ column to see the timestamp of all check-in data